Pages

Showing posts with label Scatter Terrain. Show all posts

Sunday, 25 September 2016

Aeronautica Imperialis - Terrain 1

I've actually done some hobby stuff.

A very small amount, but in the light of how much I have done over the last couple of months it can be counted as progress and worthy of an update.

As soon as I picked up that load of AI planes from eBay I was thinking I needed something Eldary for my airplanes to blow up and/or capture from the pointy eared ones (which will be referred to as "Panzies" when I'm using the Bommerz).

So I thought some bit of half buried Eldar structure, maybe a warp gate or some such would be good.

A couple of years ago I was commissioned to do a mould and casts of some Warp Vanes for a Wraithknight by the extremely talented Andy Hicks. He is an awesome converter of Eldar infantry and vehicles, if you haven't seen them I suggest you take a few hours off to browse his website. The Wraithknight with the warp vanes in place can be found on this page. He was selling casts of the vanes, so if you want some yourself drop him a line and he might be able to help you out.

I'd got a couple of the warp vanes knocking around from when I was doing the first test casts so I decided to turn them into a piece of AI terrain.


Crappy pictures I know but you get the idea. I mounted the vanes on some 1mm styrene then added milliput to bulk the bases out and help it look a bit more 'natural'. I decided to split the base so they could be either set up together or as two separate pieces. However I do wish I had made the join a bit more natural as now they can't really be set up as anything other than a pair.


Scale shot, I know, using an Eldar aircraft would have been more appropriate but I have packed them away ready to give to Nife and I couldn't be arsed to get them out just for one picture.

After the milliput had cured I covered the bases in tissue and thinned PVA. Then filler was added to the PVA and painted over. More filler (in powder form) was then sprinkled over.

To be honest I was making it up as I went along hoping to get a pleasing result. I didn't want to just sand it as I thought that would be both boring and not really fit the scale.


Quite happy overall. Needs bit more cleaning up and GS to the one air bubble but otherwise it is close to being done. I may decide to add more filler to one base to have the vane a bit more buried. We'll see.

Wednesday, 7 January 2015

Shipping Container 1

I am slowly getting over whatever crap I have had for the last 'x' weeks.

Hopefully this weekend I will actually be in a state of touching a model (shocking I know).

In the meantime I managed to spend a couple of hours doing some quick mock ups of something I have been looking to do for a while.

Mainly for use on a Zone Mortalis board I have wanted some large shipping containers to give some cover in large rooms big enough to block LOS easily.

So with some card and foamboard we have the mock up for the size:
 

Big enough for an Ogryn to stand up.


The standard size will be 150mm long.

From here I did some very quick 3D models to show how I plan to build this thing.

Basically the main body would be made up out of 'rings' which join up to make the full length, I want to do it this way to allow me to vary the length but also to keep costs down and make it easier to cast the pieces up. At each end would be an end plate incorporating a door.


Keep in mind no details have been done yet - this is just basic shapes, I'll be starting from a clean slate when I come to do the proper model.


The interior will be detailed up and the door will be removable (hinged possibly?) to give the option of having the container open.

This won't be a quick turnaround (due to not having the time to throw at it) and it won't be cheap to get it off the ground due to the 3D printing costs.

However if people are interested in maybe picking up some casts it is more likely to happen sooner rather than later.

If your interest has been peaked let me know below.

Sunday, 16 March 2014

Ruins 3

Not been able to get much done model wise of late but the ruins have progressed a bit.

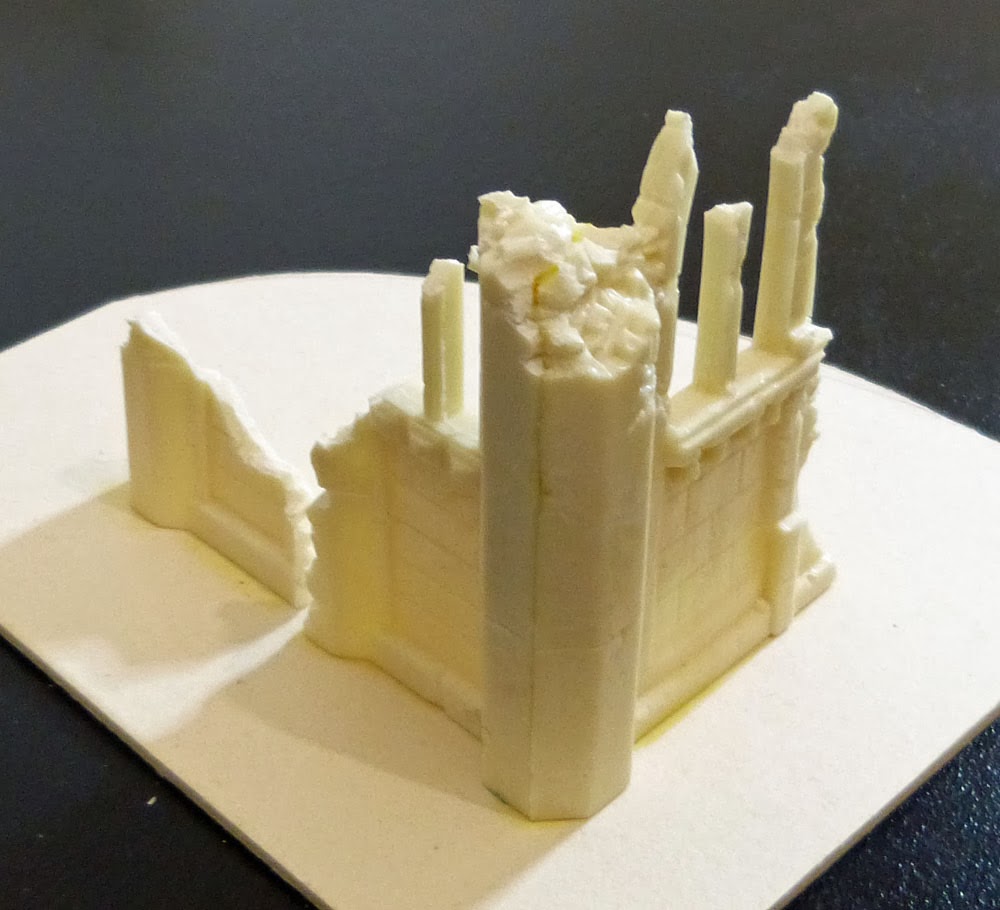
I added more rubble to the bases as well as add in some resin bits, basically bit of the ruins I had cut off.

I also attacked the walls with the dremel to add some more damage from small arms fire etc.


The insert above shows one of the resin off cuts I added in to the rubber. Not sure they worked as well as I hoped but oh well.


I am thinking of adding in some flooring to a few of the corner pieces including this one.


Managed to get them all undercoated today...


Even though I am going to (almost certainly) be adding some floors in I still wanted to get them undercoated at this point as it will be far easier to undercoat without the floors in.


Next up i'll look at adding some floors.

Thursday, 6 March 2014

Terrain Time - Ruins 2 & Scatter Terrain 19

Things have been quiet but I have been (slowly) plugging away. As such here is an update (small it may be however).

Ruins 2

I cut down the bases of the ruins, added some foamboard to what would be the inside of the building then added a layer of sand.


I put together a couple of more pieces, rather than corners again I did a couple of straight walls.


Picture below was taken before I did some more GS work to the join.


Tonight I started to add the rubble. This is just the first pass, once the glue has dried i'll knock off the excess and add some more. I will also add in some resin pieces.


Scatter Terrain 19
I finished adding the stores to the last of the pallets:


The last few pallets used the new, larger crates:


Next up I will give these a coat of undercoat before I start adding the tarps. Progress will thus be dependant on the weather.

So don't expect progress on them any time in the near future.

Tuesday, 25 February 2014

Terrain Time - Ruins 1 & Scatter Terrain 18

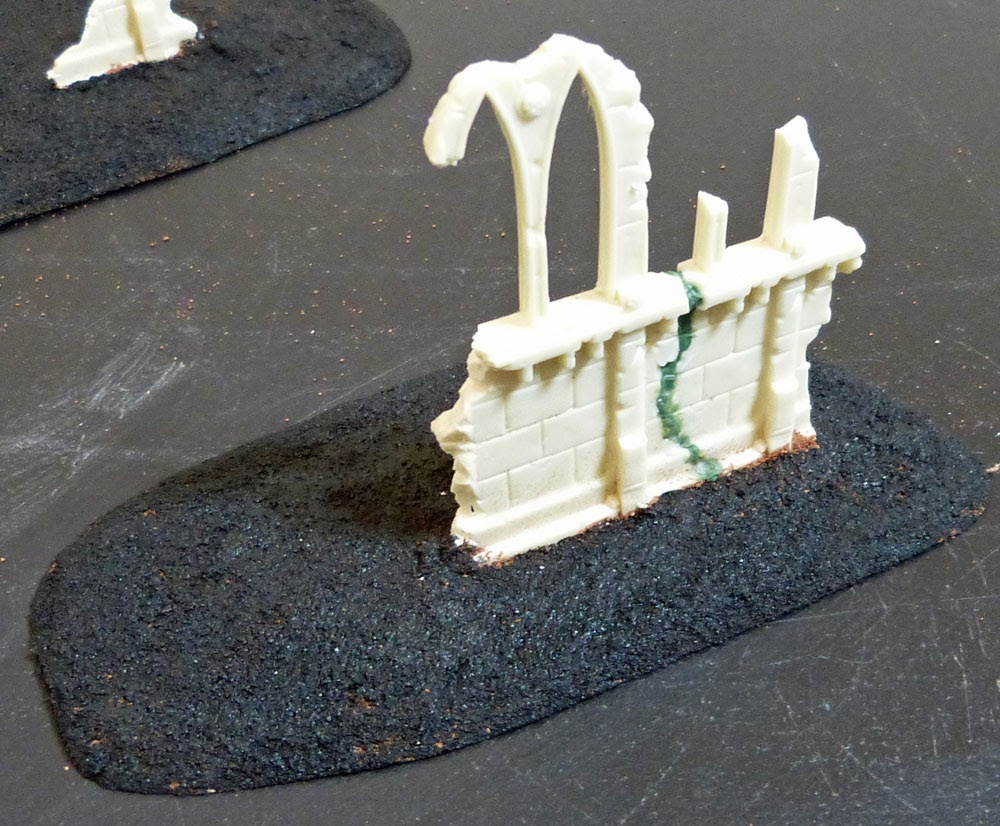
You may remember some time ago I did a mould for a long gone GW ruin. I used a cast of this on the second Blight Drone base and also a part on the Jabberslythe/Giant Spined Beast.

The plan was always to do more casts and use them as terrain.

Finally got round to starting these.

Ruins 1


As you can see this is very early in the build. I need to build the bases up next with some foamboard (as I did on the Blight Drone base). The Finnboard is just cut roughly to shape at the moment.


Rubble will cover the gap between the small 'islands'.


On the last piece I did a second cast of the wall with the arch then added this to the first piece. Was a bit tricky but overall very happy with it.


Scatter Terrain 18

I've cast more pallets and stowage but for this update just a quick post as I decided to do a new crate. Basically I wanted a bigger cast, so I took two cast crates and with a bit of fiddling ended up with one big cast which was then turned into a mould...

Original master on the left, new larger crate master on the right.


One of the best things with these stores moulds is that it allows me to minimise any waste resin. Any excess mixed up can simply be poured in, then bits of scrap resin from pour vents, sprues etc can be chucked in as well...


And half hour later we have the first cast:

Wednesday, 12 February 2014

Scatter Terrain 17

Quick update on the pallets.

I've cast more pallets and started to add the stores to them all. Now the cast quality of the stores isn't perfect because as they will all be covered in tarps it wasn't important, hence I did quick and easy casts without using the pressure tank.

I also added some scale model pieces to add variety.


As you can see above I have some casts of the now no longer available Chimera/Russ & Baneblade road wheels. I did these just for this purpose.


I plan to keep casting pallets this weekend as I have loads more store casts and scale model bits to use up. I also want to make some larger crates to add to them and start mixing in some Guard bits.

Once I have more cast up I'll start adding the tarps.

As a reminder this is one of the test pieces I did when I started experimenting with tarps:


Should have another update up this weekend.

Tuesday, 31 December 2013

Recalcitrant Daze - This Isn't a Review of the Year Post.

..it just happens to fall on New Years Eve.

Due to the holiday festivities not a huge amount on the hobby front has been done lately.

What I did have was a couple of days of gaming, it broke down to a day of Dreadball and a day of 40K.

Dreadball...

For Dreadball I had to knock up some bases for my Robot team. Basically Dreadball team members can be either Strikers, Guards or Jacks (i.e. Jack of all trades). Robot teams though all start as Jacks and then have the ability to change roles during the game. So to keep track of all these changes I modified a Dreadball Hex base and then cast up a shed load of them. Adding a washer into the base and a magnet to the players I could colour code the bases...


Blue for Jacks, Red for Guards and White for Strikers.
The bases worked perfectly - except for the blue on the Jacks being a bit too dark to see easily in the light. As such I'll change that to a lighter colour, probably green.

I also had to knock up some counters, while I had bought everything else I needed to play the game I didn't buy the handful of counters you need. Simple enough job to do.


As for the games themselves all three finished 3-0 which was a bit weird. I won two and lost one (but so very nearly one that one with the last play of the game).

Hopefully I'll start putting the team itself together soon so expect some updates in the near future.

40K...

The Daemons had a run out...nothing to really see here except for the first time in the new house I got to set up the full gaming board in the living room, I say 'full board' but I mean a full 6x4 gaming board...not all the RoB panels I've got as that would be something of a squeeze.

Gaming in Comfort
The two games ended up a win each, with some of the dice rolling I had I'm surprised I didn't lose both heavily.

In case we played ZM I also cast up some more pallets...


In the end I didn't need them, but i'll get on with adding the stowage and tarps now so they should be ready for the next 'Gaming Meet Up'.

Talking of terrain I don't usually get hobby related stuff as presents but this year I did get Stronghold Assault. Nice book though would of been so much better if they had put the effort in to do non-Imperial themed fortifications. However as I do love a Siege expect at some point more terrain in the shape of bunkers etc appearing on RD. You have been warned.


And Finally...

As I've not done one of these general rambling type of posts here are a couple of new Blogs I am now following...

Seismic Miniature Painting Studio

40k Hobby Blog

Tuesday, 24 December 2013

Scatter Terrain 16

Well after six straight posts on the Junka I thought it would be good to have a post which is completely different.

I've been doing some casting recently due to getting some new equipment (I'll cover that in another post on it's own later) and I decided to return to a project I last looked at way back in July 2012 - I can't believe it has been that long...- namely some pallets for scatter terrain, especially for games of Zone Mortalis.

Due to it being so long it is probably best if I start from the beginning.

I did some 3D models...


You can make out in the pics that one hole was skull shaped, just for fun.

Each pallet was in two parts, namely a base and a top. These were then 3D printed, and after cleaning up (the ID plates didn't come out at all) and a coat of grey spray they looked like this:


So going with the large pallet I decided to finally get some moulds done and pieces cast.

The base went off without a hitch and I've now got seven cast up, I say without a hitch I made a cock up with two of them and amazingly managed to not put enough resin in, but I just carved a bit of battle damage into the one corner and it'll be fine.


When I opened up the mould for the top I hit a problem. I can without worry of being contradicted say that this it the worse mould I have done. Due to me rushing it and trying to recycle old rubber I found there was a number of air bubbles (more than a dozen), but those can be worked round easy enough - it just means more clean up of the casts will be required. However the worst thing is that a small area of rubber had 'lifted away' (I can't think of a better way to describe it) from the master. It's not an air bubble as the 'lifted' area has the detail moulded in it...
 
Weird.
So I am in split mind as to what to do, I could do a new mould but that would take a couple of days and even recycling the old mould would still cause some waste and I need what unused rubber I have left for other things. I think I can get away with it. It's in an area where stores can always cover it, plus I will be adding tarps to most of the finished pieces so I think I can always cover up what isn't covered by stores. Certainly for now I am going to use this mould to knock out some pallets.

Once cleaned up the assembled pallet looks like this:


And with some quicky cast barrels...


As mentioned above the plan will eventually have tarps over these things, as shown in my earlier experiments...


So that's that for now, I will knock out some more pallets and start getting stores on them and tarps added. I'm not sure if I want to do the small pallet, I think it is a bit redundant to be honest. But I may come back to it in the future.