First up the plinths...
Will definately have to do a second set of moulds otherwise it'll take me all year to cast enough pieces. Alas I had to scrape out the tin to get enough rubber to do all these moulds. So need to order more rubber, again.
The plinths set up with the other walls pieces. Shows the two line system where the troops behind the second line can fire over the first line.
Will need to give the staight plinths a light sand at the ends, the small tolerance build up means I have some small gaps - in principle I don't mind this as I like the rough and ready look but would be nice to get it down slightly.
 |
| Militiaman Bob for scale. |
Above shows the idea of the firing step. Planking slotted into the plinths with a support on the other side. Still need to sort the support out, at the moment one of the mounting plate moulds stands in.
At the same time as casting the plinths in plaster I also cast some mounting plates and rebar in resin.
Rebar - turned out nicely I think. The attempt to do a one piece mould worked, though I had to modify the mould by cutting a slit down it. While casting the rebar was fine I simply couldn't get it out, the ends simply snapped off when I tried to pull it out. The slit allows me to get it out easily enough but does mean I have a mould line. As you can see in the picture above I managed to get a piece of bent rebar by taking out the cast early and bending it while still soft, some masking tape held it in place while it hardened.
Mounting Plates - I estimate 1 in 4 will be chucked due to air bubbles, they are simply to small to mess around filling holes in. I did two moulds for these as I have a lot of them to knock out...
 |
| Some mounting plates in place (though not glued). |
I also started casting the gun emplacement wall pieces, still need a few more to get the full length of wall required.
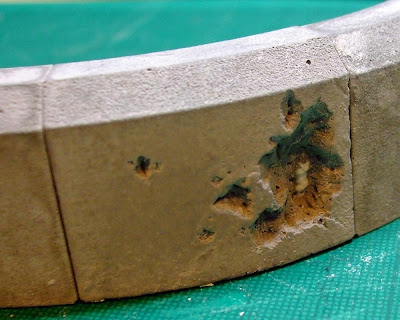
It was while casting the last piece I suddenly realised I hadn't actually used any of the rebar to see how it turned out so I pushed a bit into this wall panel.


This is so awesome. Very inspiring effort - you're making this look much too easy - is it as simple as it all sounds or is this a complex(ish) project to manage?
ReplyDeleteNot really...providing you have access to decent 3D modelling software. There is free software available but i'm not sure how good that is. After that it is simply a case of uploading the model and waiting for your prints to arrive in the post.
DeleteTwo words, not necessarily in order:
ReplyDeleteWANT DO!
Look awesome. Gotta say that the solution you've gone with for the raised walls works really well... I like that you can use the sections without a firing step if you wanted to. It "looks" right.
ReplyDeleteAgreed, these walls are amazing and they look very authentic. It certainly adds a level of realism to the game.
ReplyDeleteKeep up the amazing work rictus!
Are you going to be selling these, man? I would consider buying some from you if you are...
ReplyDeleteI am happy to sell some sets to people, once i have more rubber turn up so that it speeds the casting process up. Any casting would have to fit around other things though so I can't promise it would be a speedy service...
DeleteCheers for the comments everyone. Appreciated as always.
ReplyDeleteI did a bit more casting last night but I am going to spend a bit of time working on the Looted Wagons before coming back to the walls.
Dam these are turning out great mate nice job, I would be down for some stuff if you do sell.
ReplyDeleteThey will make some great display sections .
The walls look great - I love the modular system! The rebar is a great idea too.
ReplyDeleteCheers for the comments.
ReplyDeletelone: If the demand is there I may sell some casts to people. it all depends on both the demand and price I can sell them at. The time to cast everthing, especially rebar and mounting plates may mean it just isn't worth while.
As an alternative I may sell moulds for people as this would dramatically reduce my time and let people have as many pieces as they want at dramatically reduced cost.